


« Blue Springs Florida Dive Profile | Main | The Making of Under the Sea 3D »
November 02, 2010
Shooting HD Video with Digital SLRs: What You Need to Know
Last November I purchased a Canon EOS 7D for shooting underwater video. When I opened the manual, I was overwhelmed by a wave of questions... Which frame rate is best for posting video online—60p, 30p or 24p? Which Picture Style Menu Setting is the best for underwater videography? How are frame rates different from shutter speeds? How do I capture the whole scene in focus when shooting fast-moving subjects?
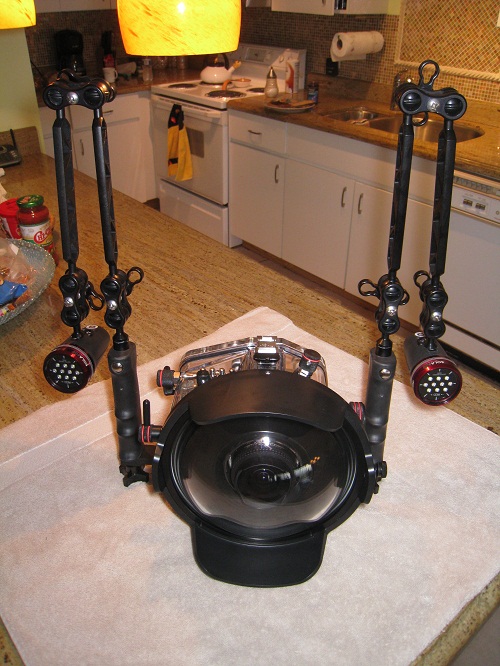
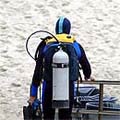
My rig: Canon 7D, Ikelite 7D housing, Tokina 10-17mm wide angle fisheye lens, 8-inch dome port with shade, Ultralight arms, Light & Motion SOLA600 focus and video lights.
The emergence of HD video capable Digital SLRs, like the 7D and Nikon D300s, has forever blurred the lines between camcorder and still camera. Unfortunately, Digital SLR videography is in its infancy, so I scoured various Web sites, posted numerous questions on VIMEO and called Backscatter more times than I can remember to find answers to my questions. If you're considering making the dive into Digital SLR video or are just getting your feet wet, here's what I think you should know:
Digital SLR Pros
• Censor Size: Digital SLRs have large CMOS sensors. For example, the Canon EOD 5D Mark II is 36x24mm and the 7D is 22x14mm. In comparison, the leading cinema camcorder the RED ONE is 24x13. Larger sensors gather more light and produce images with lower noise, which is critical considering the low-light conditions produced underwater.
• Cost: A full RED ONE body alone costs $17,550—more than six times the cost of the 5D Mark II body. Most prosumer camcorder housings start at $2,500, which is still more expensive than the Ikelite Digital SLR housings, which start at $1,500. Keep in mind that with both Digital SLR and camcorder housings, ports are an additional cost.
• Frame Rates: The most popular frame rate is 30p. However, Digital SLRs enable users to choose various frame rates. With the 7D, users can chose 60, 30 or 24p. I’ll explain later in this article which frame rate should be used for what scenarios.
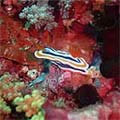
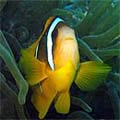
• Depth of Field: Users can determine the depth of field by increasing or decreasing the aperture, which drastically alters the style of the video. For example, when I shoot macro subjects, like a decorator crab, I prefer opening my aperture to 2.8 and blurring the background to make my subject stand out.
BTW, did I mention Digital SLRs also take 18 megapixel still images?
Digital SLR Cons
• Stability: Digital SLR housing are more awkward underwater than their camcorder counterparts. They tend to be negatively buoyant and unevenly balanced—causing them to tilt forward and descend port down. To resolve this, most videographers attach buoyancy floats to their video light arms and attach tripods to their trays. Tripods don’t only stabilize macro shots—when swimming, videographers swing the tripod legs left, parallel to the tray. They hold the legs with their left hand and the right tray handle with their right hand, creating a wider grip that makes it easier to hold the Digital SLR stable.
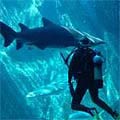
• Continuous Video Autofocus: When shooting a fast-moving subject, like a Black Tip Reef Shark, it’s beneficial to have continuous video autofocus to ensure your subject doesn’t move in and out of focus. While the Nikon D7000 and D3100 and Sony Alpha55 include continuous autofocus, Canon’s Digital SLRs don’t. To overcome this obstacle, Canon users must narrow their aperture to between f/16 and f/22, which increases the depth of field or makes the whole scene in focus. While this quick fix sounds simply, it reduces the amount of light available to the sensor. In turn, you have to either boost your ISO, increasing noise, or introduce artificial lighting from video lights.
• Censor Overheating: Digital SLRs tend to overheat when they shoot video for prolonged periods of time. This is due to their compact form factor, which is devoid of cooling spaces. To prevent sensors from overheating, and being destroyed, the Nikon D7000 limits continuous shooting to 20 minutes. The 7D alerts users when the sensor is getting too hot, then automatically shuts down if the user doesn’t turn the camera off. For me, this is the most frustrating con. Last month I was in Florida filming macro subjects in Blue Spring when out of nowhere a manatee swam up to me. I swung the 7D around and up popped the alert, forcing me to shutdown the camera just as the action started heating up.
• Dedicated Lenses: This is my second most frustrating con and will arguably be the top one for people used to shooting video using camcorders. Unlike camcorders, Digital SLRs can’t transition from wide angle to macro underwater. Once you attach your lens and lock the housing, you’re stuck. When I assembled my rig for Blue Spring, I didn’t plan to see anything larger than a basketball, so I attached my Canon EF 100mm f/2.8 USM Macro Lens. When the manatee surprised me, I had to capture video of it using my macro lens. To get it into the frame, I had to swim 15 ft. away, putting lots of algae between us that produced video that wasn’t clear and had a greenish hue. My wide angle fisheye would have been ideal, but I couldn’t switch from macro to wide angle like most camcorder users. Here is the video:
Blue Springs, Florida from Joe Roualdes on Vimeo.
• Viewfinder: When you shoot video in shallow water, with sunny skies, the viewfinder can be difficult to see, which makes framing your subject difficult. This is less of a problem the deeper you descend.
• The Jell-O Effect: I’m sure you’ve heard of the dreaded “Jell-O Effect.” While the technical causes aren’t important, this is: Don’t worry about it. Abrupt, quick stop-and-go pans cause the Jell-O Effect. Since slow, fluid pans are visually appealing, and the aforementioned ones aren’t, your videos should never suffer from Jell-O Effect.
60p vs. 30p vs. 24p
• 60p is only available when shooting 1280×720 (720p). This frame rate is ideal for fast filming fast-moving subjects because you can slow the video down in post production. If you chose this frame rate, do not exceed 1/125 sec shutter speed—it will degrade the video quality.
• 30p produces video similar to TV Shows. It's ideal for posting content online or on an HDTV. If you chose this frame rate, do not exceed 1/60 sec shutter speed.
• 24p produces smooth, movie-like video. However, if you chose this frame rate and post your video Online, it will appear jittery. Set your shutter speed to 1/50 sec.
Picture Style Menu Settings
If you’re a still photographer shooting in RAW, Picture Style Menu Settings are irrelevant because you can easily change them in Photo Shop. For videographers though, they are more relevant because Picture Style Menu Settings are more difficult to edit in post processing.
If you do prefer to edit your video heavily in post processing, I recommend you make your Picture Style Menu setting as flat as possible—choose the Standard setting, but turn sharpening to 0, contrast to -1 and saturation to -1.
If you’re like me and do very little post processing though, I recommend you select the “Landscape” setting, which delivers maximum sharpness and vibrant colors.
What You Need to Consider Before Pressing Play
Where to get started? Before I hit “play,” I ask myself:
• First and foremost, what direction is the light coming from? You should always shoot with the sun at your back, unless you are shooting a silhouette or attempting to achieve a certain artistic style.
• Is my white balance correct? Keep in mind that when you descend or ascend, natural light changes. Therefore, you should check your white balance every five to 10 ft. you ascend or descend.
• What is my frame rate? If I’m shooting a fast moving object, like a Black Tip Reef Shark, I need a narrow aperture to ensure it isn’t moving in and out of focus. Whereas if I’m shooting a nudibranch, I should use a wider aperture to blur the background.
• How has my aperture affected my ISO? If my aperture is F16, how high is my ISO to ensure proper exposure? If it’s above 640, my video will have high noise. Therefore, I may need to rethink my aperture.
• Am I metering my subject properly? I tend to leave my metering mode on evaluative. However, if I’m going for more of an artistic shot, where the subject is correctly lit and the background is black, I will change to Spot mode.
• Then I think about how to tell the story: How do I introduce my subject to the frame? What part of the subject do I want to get video of? Do I want the subject to be silhouetted? Lots of artistic flare comes into this portion of the process.
Recommendations
• Before purchasing a Digital SLR, lenses and an underwater housing, get hands on with all the products in your price range. Review the features of the various Digital SLRs and evaluate the quality of the lenses and the form factor of the housings. Underwater videography is an expensive hobby, so you don’t want to get stuck with a rig that doesn’t meet expectations.
• If your camera has presets, use them! My 7D has three presets—C1, C2 and C3. I’ve set C1 for fast-moving objects that I want to slow down in post production, C2 for slow or stationary moving subjects and C3 is my still image setting.
• Get a large, fast memory card. I originally used a 4GB card, which was painful. Its capacity was 10 minutes worth of video. In between dives, I had to remove the card, download the content to my computer, erase the card and reinsert it back into the Digital SLR. I now have a 60GB card, which allows me to store 120 minutes worth of video and writes extremely quickly.
• Get the brightest lights possible! When natural light isn’t available, you need artificial light or your videos will appear bluish-green in color.
• Start shooting video with two lenses: a wide angle fisheye and a macro. Use the macro lens for anything smaller than a basketball and the fisheye for anything larger.
• Practice, practice, practice… and practice some more. My first day in the water with my video rig was like learning to rollerblade: awkward and embarrassing. My buoyancy was office, I couldn’t manually set the white balance, I kept bumping the video lights and arms into the reef and manually setting the exposure was more difficult than math (I’m a journalist, so that’s saying a lot). Over the past few months, I’ve established a workflow underwater. Some days go better than others, but gradually, the quality of my video is improving.
• For more information, visit the following Web sites: Backscatter, Wet Pixel, Cameralabs. To view Digital SLR video, visit VIMEO and type Digital SLR into the search bar.
Posted by jroualdes at November 2, 2010 08:04 PM
