


« Underwater Video Tips & Tricks From a Pro | Main | Ban Shark Fining in the Bahamas »
August 29, 2010
Shinning Light on Video Lights
A beginners guide to video lights
Lumens? Kelvin? Color temperature? Halogen versus LEDs? The world of video lights can be a confusing one for new underwater videographers. If you're looking for the perfect video light to add to your rig, here's what you need to know...
Why You Need Video Lights
Light is emitted from the sun in the form of various wave lengths. Longer wave lengths, like red and orange, are more quickly absorbed by water than short ones, like blue and green. Put simply, the deeper you descend and/or the further away you are from your subject, the more blue-green in color your video will be… unless you dive shallow and shoot close to your subject or utilize artificial light.
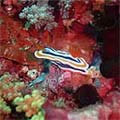
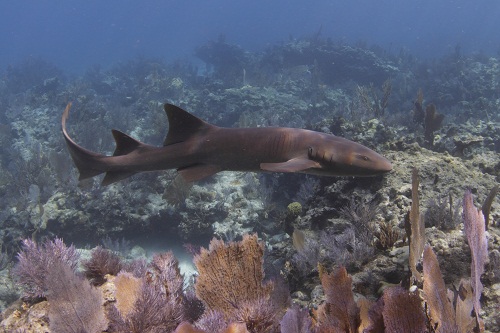
This is a photo taken from a video shot 18 feet below the surface using natural light. While the reef in the foreground is colorful, the background gradually becomes more blue-green in color the further away it is from the lens. I didn't need to use artificial light because I was shallow, the sun was intense and there was very little matter in the water.
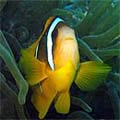
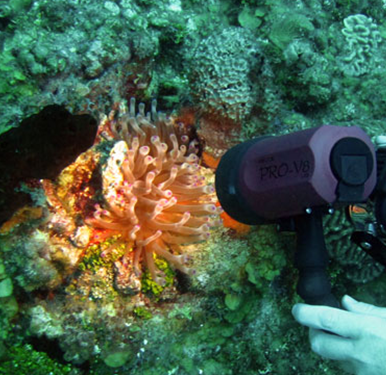
Once you descend below 20 feet, you'll likely need to use artificial light. This photo, taken by Conrad and Carol 45 feet below the surface, clearly demonstrates the importance of using artificial light. While the anemone illuminated by the Ikelite PRO-V8 Video Light is colorful, the area outside the beam is blue-green in color.
LED Versus Halogen
Light-emitting diodes, or LEDs, are the new black in lighting. LEDs are popular among dive and video light manufacturers because they are small, energy efficient and durable. They are expensive to produce though, making dive and video lights featuring them more expensive than halogen-based products.
In contrast, halogen light bulb-based products are cheaper to produce, but less efficient, durable and environmentally friendly than LEDs. Therefore, most dive and video light vendors have discontinued their Halogen-based products in favor of LEDs.
Light Lingo
Like any industry, video lights have their own lingo. Here’s what everything means and why it matters to you...
• Lumens: The brightness of a light. Three-hundred lumens is less bright than 500 lumens. Many video lights allow you to adjust brightness. For example, the Light & Motion SOLA600 switches between 600/300/150 lumens.
• Kelvin: The color temperature, or warmth or coolness, of a light. The smaller the number, the warmer the light. The larger the number, the cooler the light. While difficult to articulate, here’s a great example: Incandescent light bulbs, which are popular in households, give off a warm yellowish light (warm), while new energy-efficient light bulbs emit a white light (cool). Natural daylight, for example, is around 5,500 kelvin, while LEDs are around 6,000-9,000 kelvin.
• Color Correction Filter: Filters that make video light color temperatures warmer. These filters, like the Fisheye LED Twin Filter/Diffuser, easily attach to video lights. They unfortunately also significantly reduce the brightness of the light.
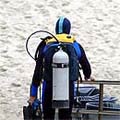
What You Need to Get Started
• A camcorder or still camera: Most point-and-shoot cameras record video, as do some digital SLRs, like the Canon 5D Mark II and 7D and Nikon D300s and D3100.
• An underwater housing:
- Point-and-shoot: Ikelite makes inexpensive housings. Some vendors, like Canon and Olympus, make their own housings too. Review both options and compare prices, ergonomics and features.
- Digital SLRs: Vendors include Ikelite, SeaCam, Subal, Aquatica, Nauticam and Sea & Sea. Prices range from $1,300 to more than $5,000 depending on the material the housing is comprised of and its features. If price is your key consideration, Ikelite is likely your best choice. Make sure you demo all the housings you’re considering since cost, features and ergonomics vary.
- Camcorders: Vendors include Light & Motion, Seatool, Aquatica and Gates. Like with Digital SLRs, make sure you demo all the housings you’re considering.
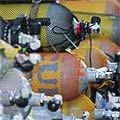
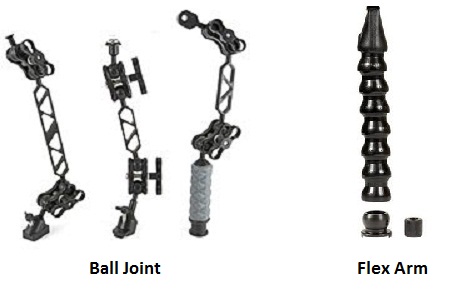
• Arms: They extend from housing handles and easily attach to video lights. There are two types of arms – ball joint and flex arm. Both work well, but ball joint arms are more flexible and expensive. Here’s what they look like:
• Video Lights: While it’s best to use two video lights to reduce shadows, using one is better than none.
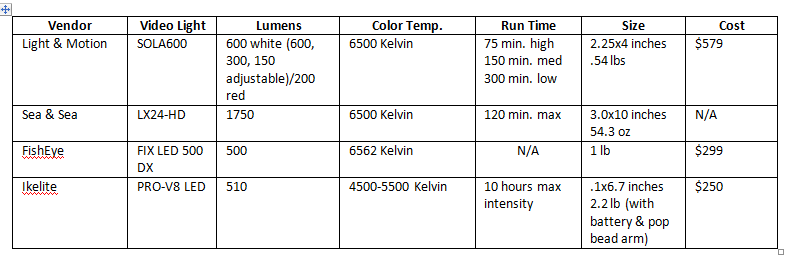
Which Video Light is Best?
That depends on your budget and what you’re hoping to achieve. To help you decide, below is a comparison of the entry-level video lights offered by prominent video light vendors.
Most Common Errors
What most commonly ruins a perfectly good video is backscatter – matter illuminated by video lights. Here’s what backscatter looks like:
Example of Backscatter from Joe Roualdes on Vimeo.
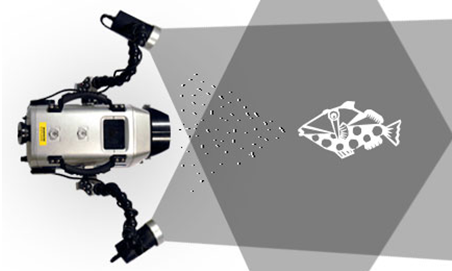
See the dandruff-like spots throughout the video? Backscatter occurs when video lights are angled in, illuminating the space between the lens and subject, which is exactly the mistake I made when shooting video of this puffer fish. Here’s a great illustration featured in a Backscatter article by Sy Harris.
To ensure that backscatter doesn’t ruin your video, angle your video lights so that their inner edges illuminate your subject and create a dark space between the lens and subject. Here is an illustration of this technique (from Sy’s article also).
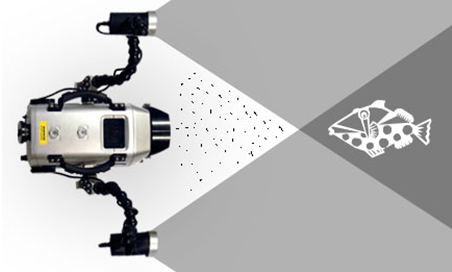
As you can see, the space between the lens and subject is free of light and doesn’t illuminate matter.
Hot spots -- an area of your video that is significantly brighter than the rest -- are also another phenomenon you want to avoid. They are caused by reflective surfaces, like sand or fish, and overexposing a high-contrast photo. To prevent hot spots, check your exposure and turn down your video light lumens if possible or point your strobes away from reflective subjects.
Always remember to wipe bubbles off your dome before shooting video. If you don’t, you’ll wind up with tiny bubbles that reflect the sun and ruin your video.
Important Shooting Techniques
Write this down, it’s important… always keep the sun at your back. It will help reduce shadows. If you shoot into the sun, the area behind your subject may be dark. To determine the direction of the sun, hold your hand up at the beginning of each dive. The side of your hand that’s illuminated marks the direction the sun is coming from.
Don’t rely on zoom -- get as close to your subject as possible! Most video lights only project light several feet. By getting close to your subject you limit the backscatter, illuminate your subject and get a sharper video.
Remember to shoot your subject at various different distances and angles. Viewers typically tire of videos that don’t transition after 10 seconds. Therefore, shoot an establishing video that places your subject in a scene, then transition to a close up shot.
Use the rule of thirds, which states that your composition should be divided into nine equal parts -– two equally-spaced horizontal lines and two equally-spaced vertical lines. Your subject should be placed along those lines to create the best composition. Note that most camcorders and still cameras have a feature that allows you to turn on and off a grid on your LCD screen.
Everyone has video of fish swimming. Differentiate your videos from others by filming fish doing something different, like hunting, hiding or mating. The more you can make your video standout from the rest, the better.
We hope you found our guide to video lights illuminating -– pun intended. Let us know if you have any questions or comments. We’re currently out testing Light & Motions new SOLA600 video and focus light. Keep an eye out for our review next week.
Posted by jroualdes at August 29, 2010 03:50 PM
